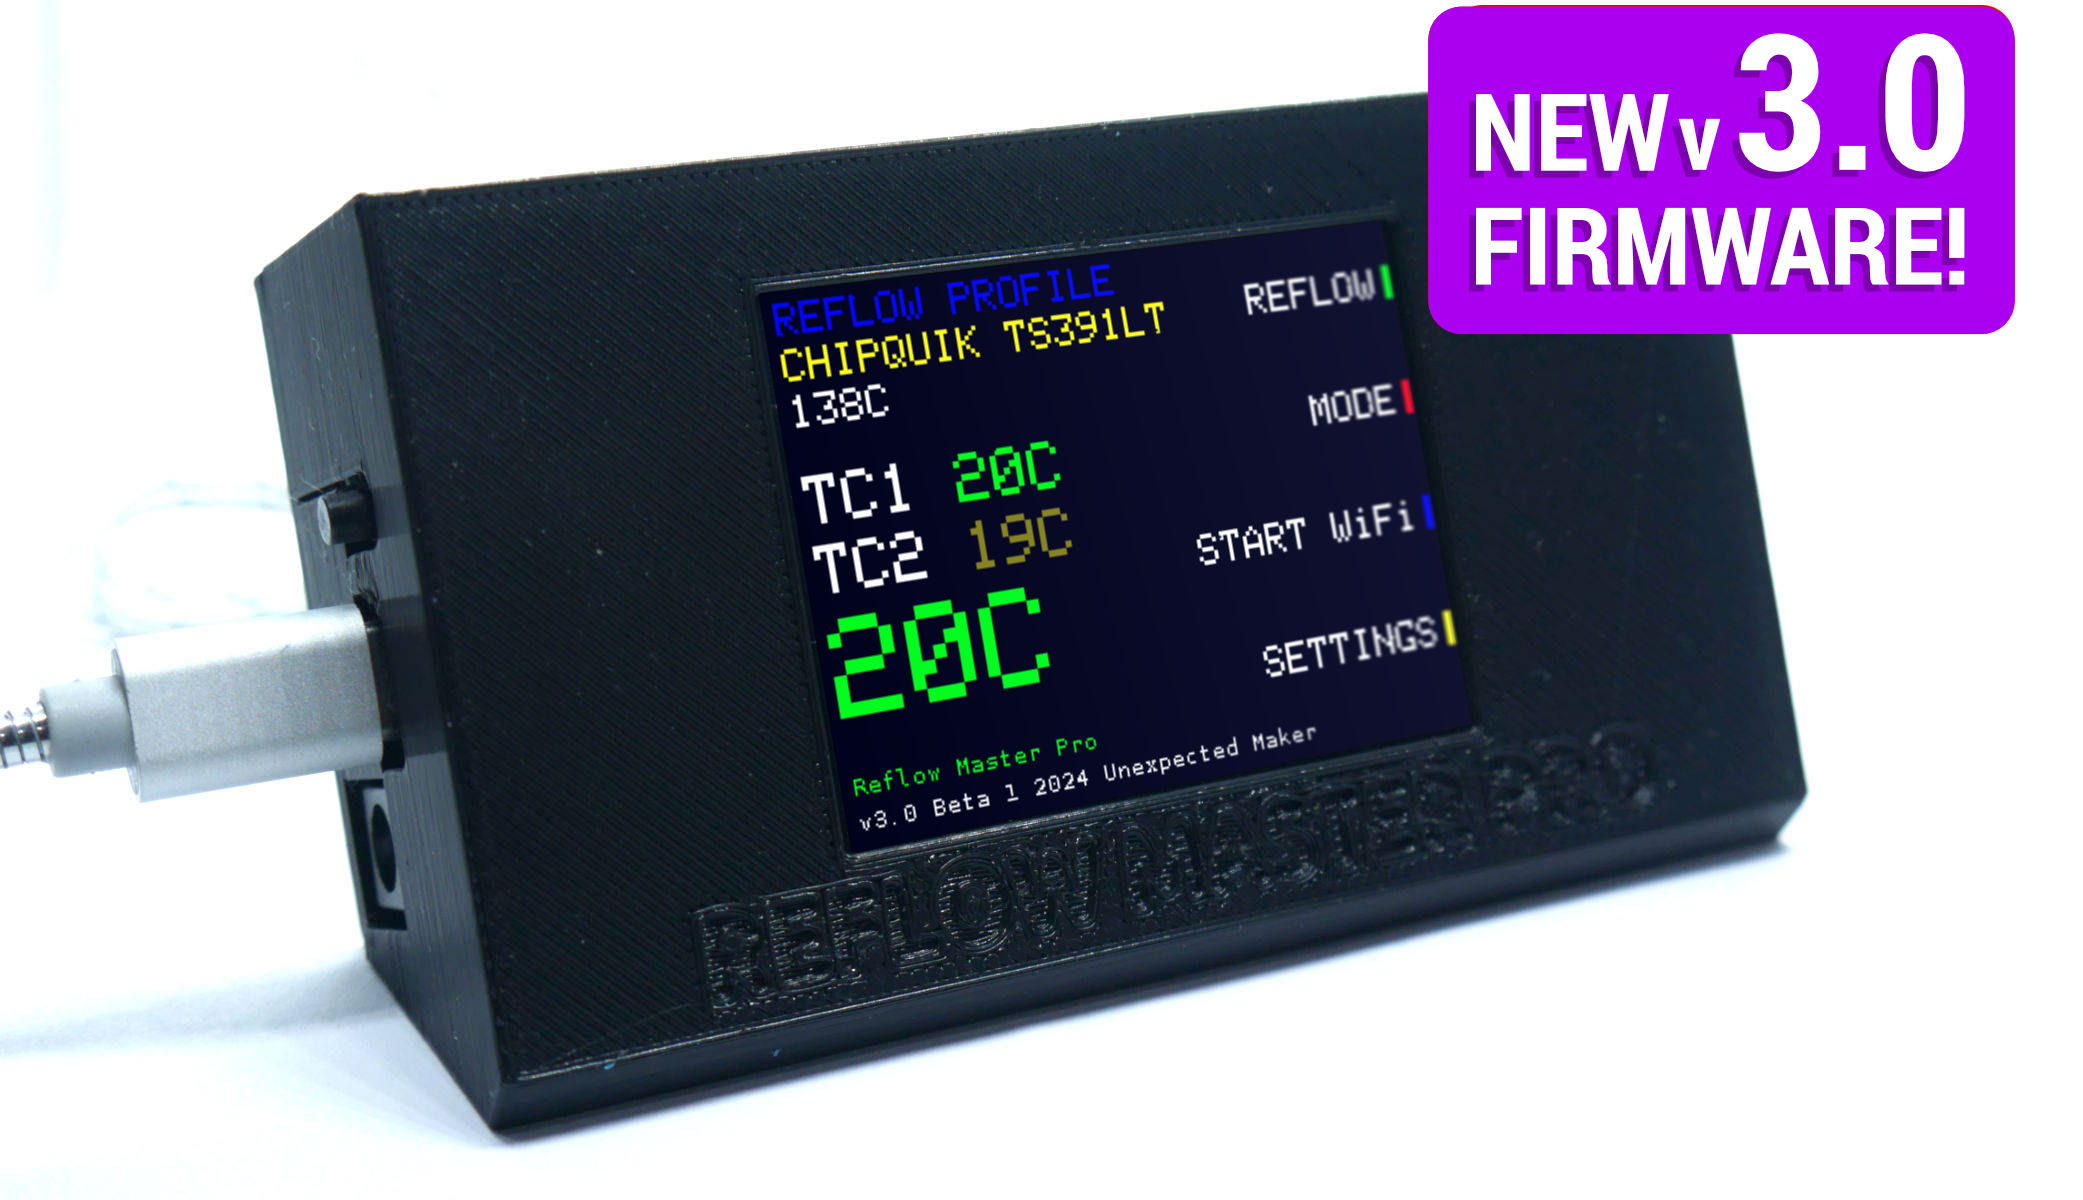
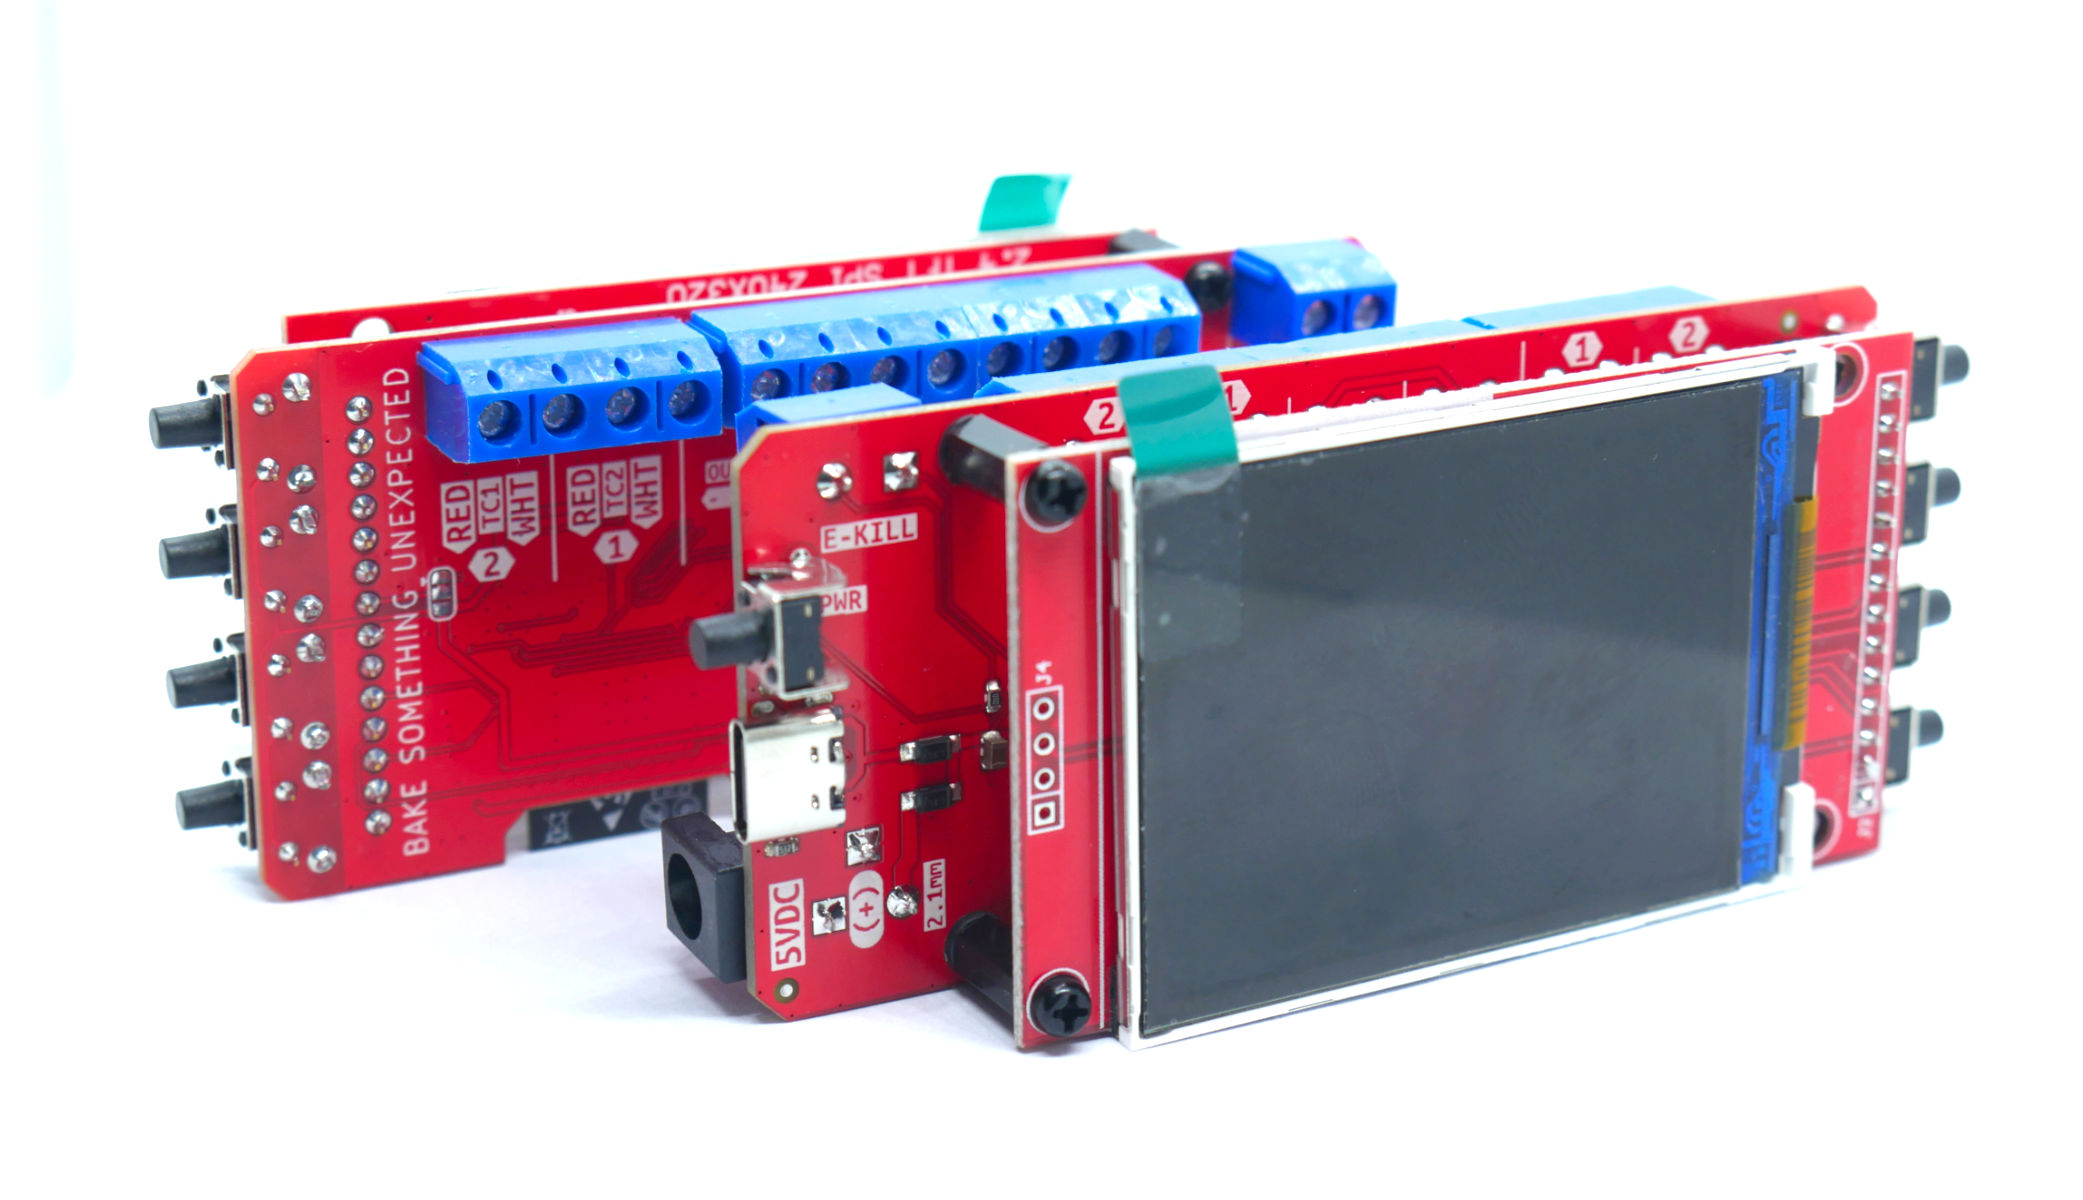
- A fully assembled and tested Reflow Master Pro
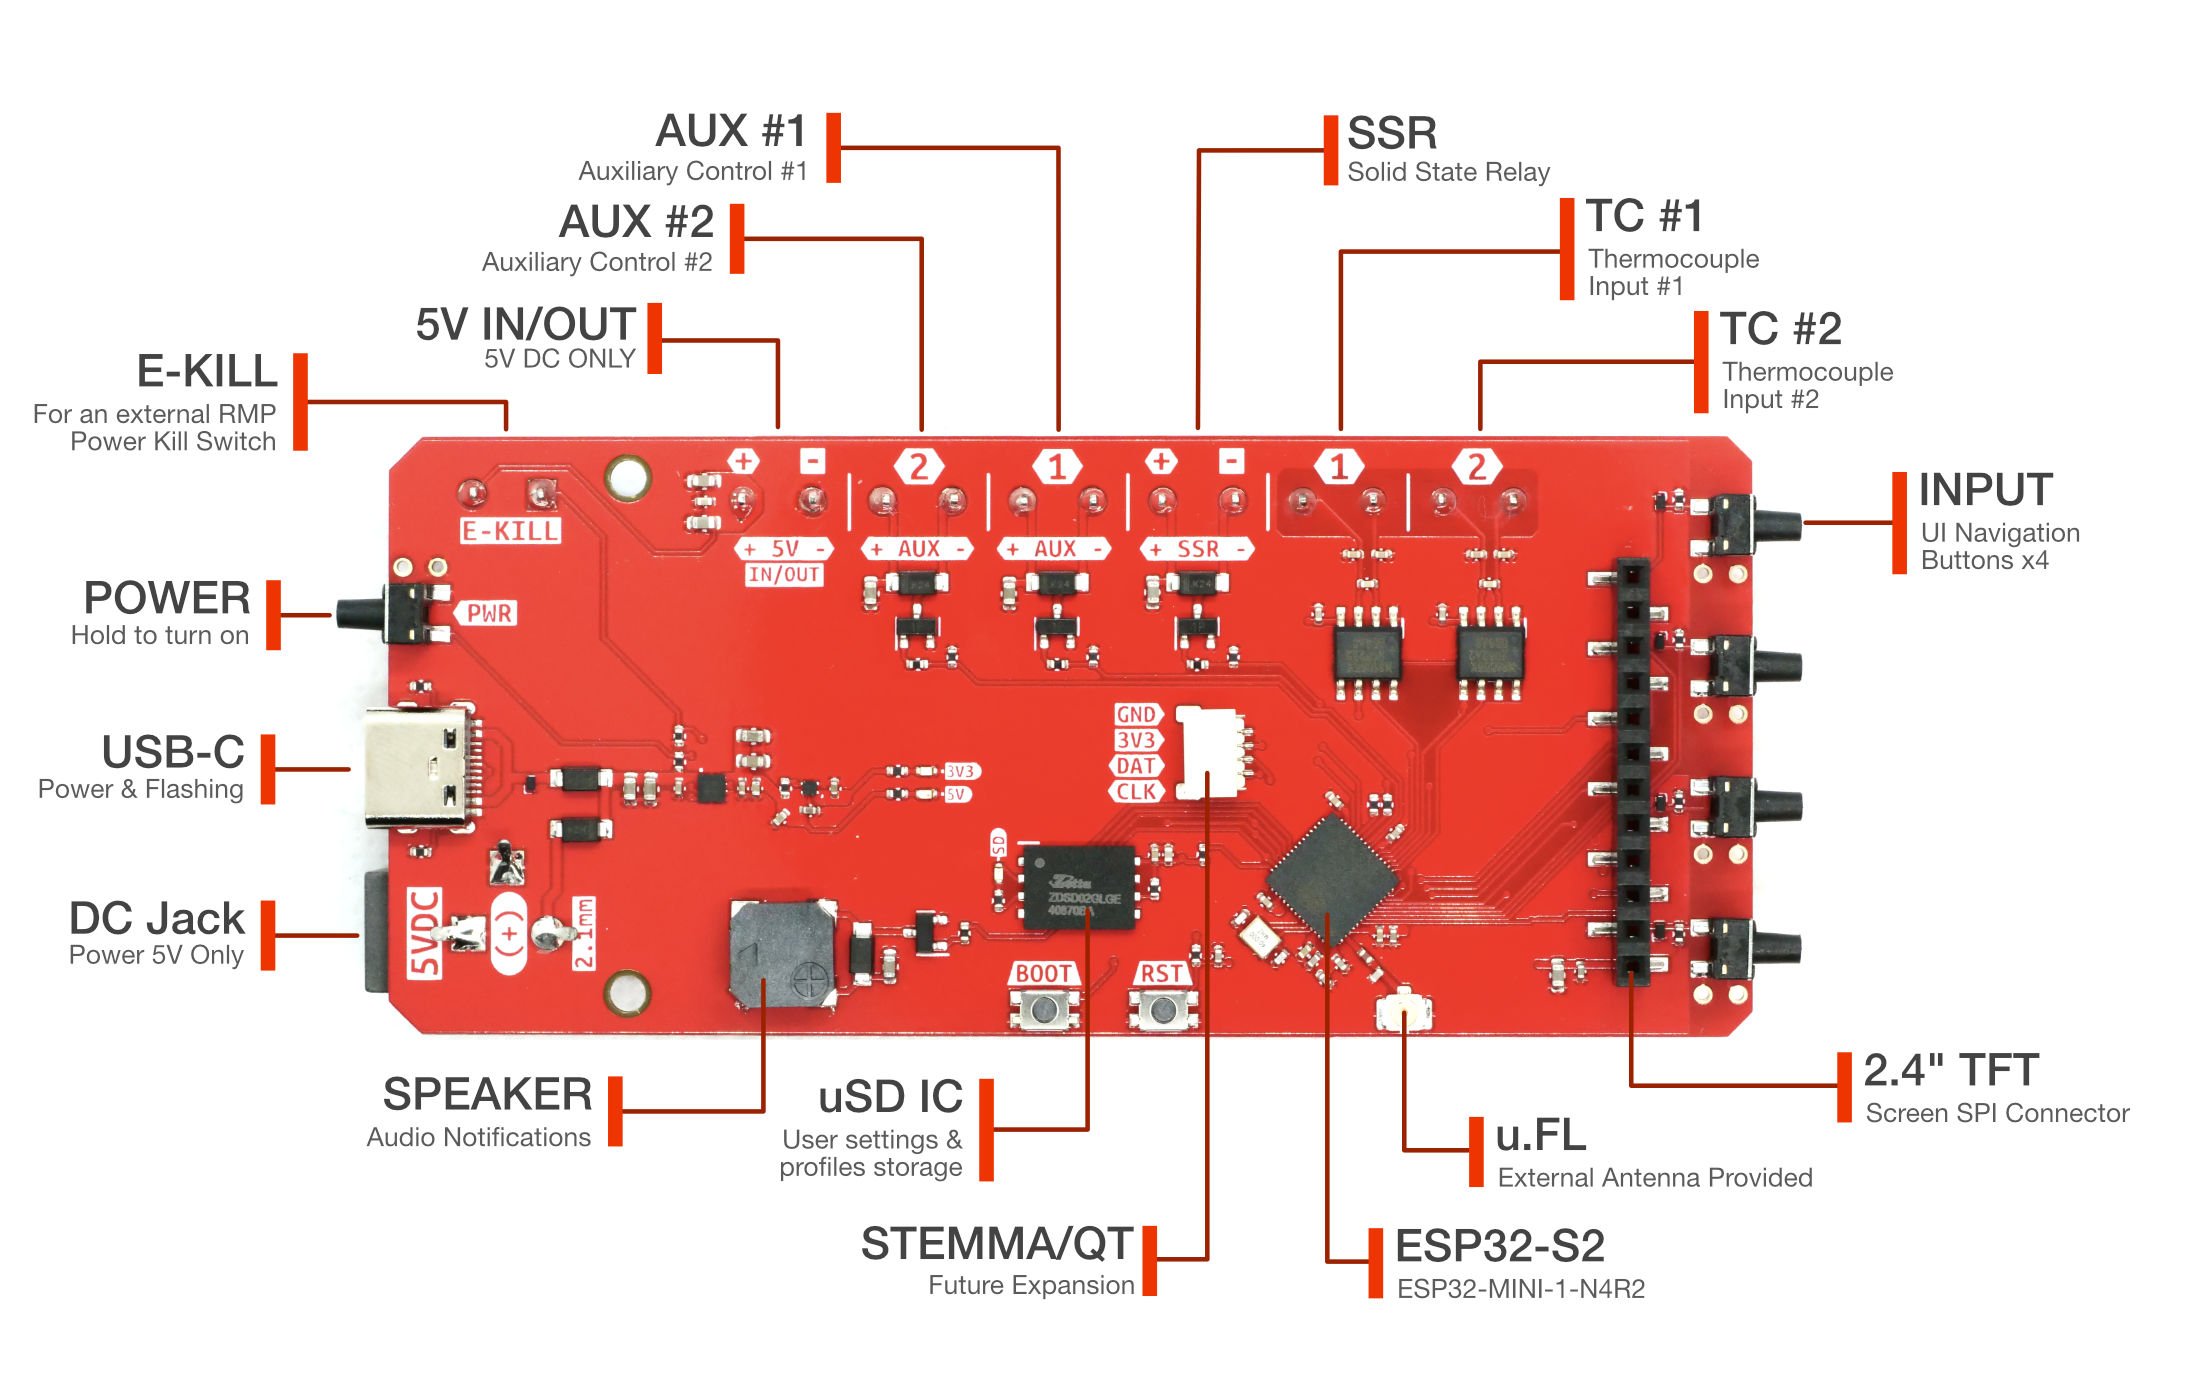
- 2.4" Colour TFT screen
- 2x K-Type thermocouples
- 1x External Antenna
- Optional items include:
- 3D printed case (pictured above)
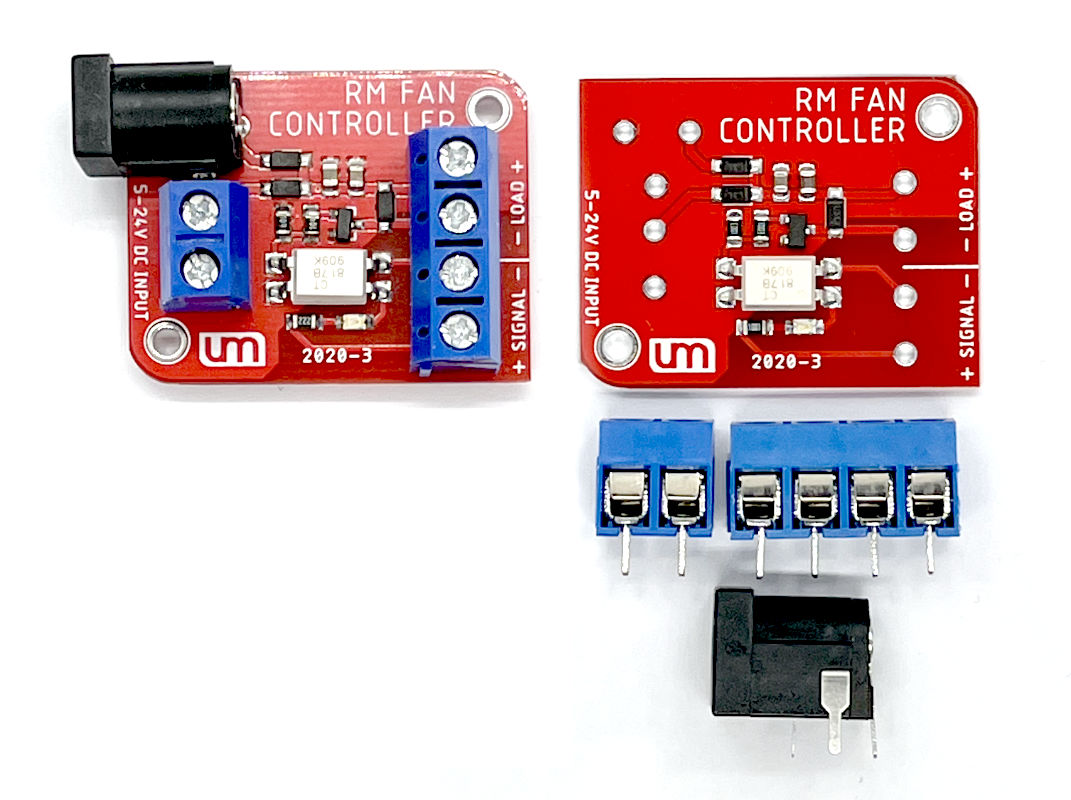
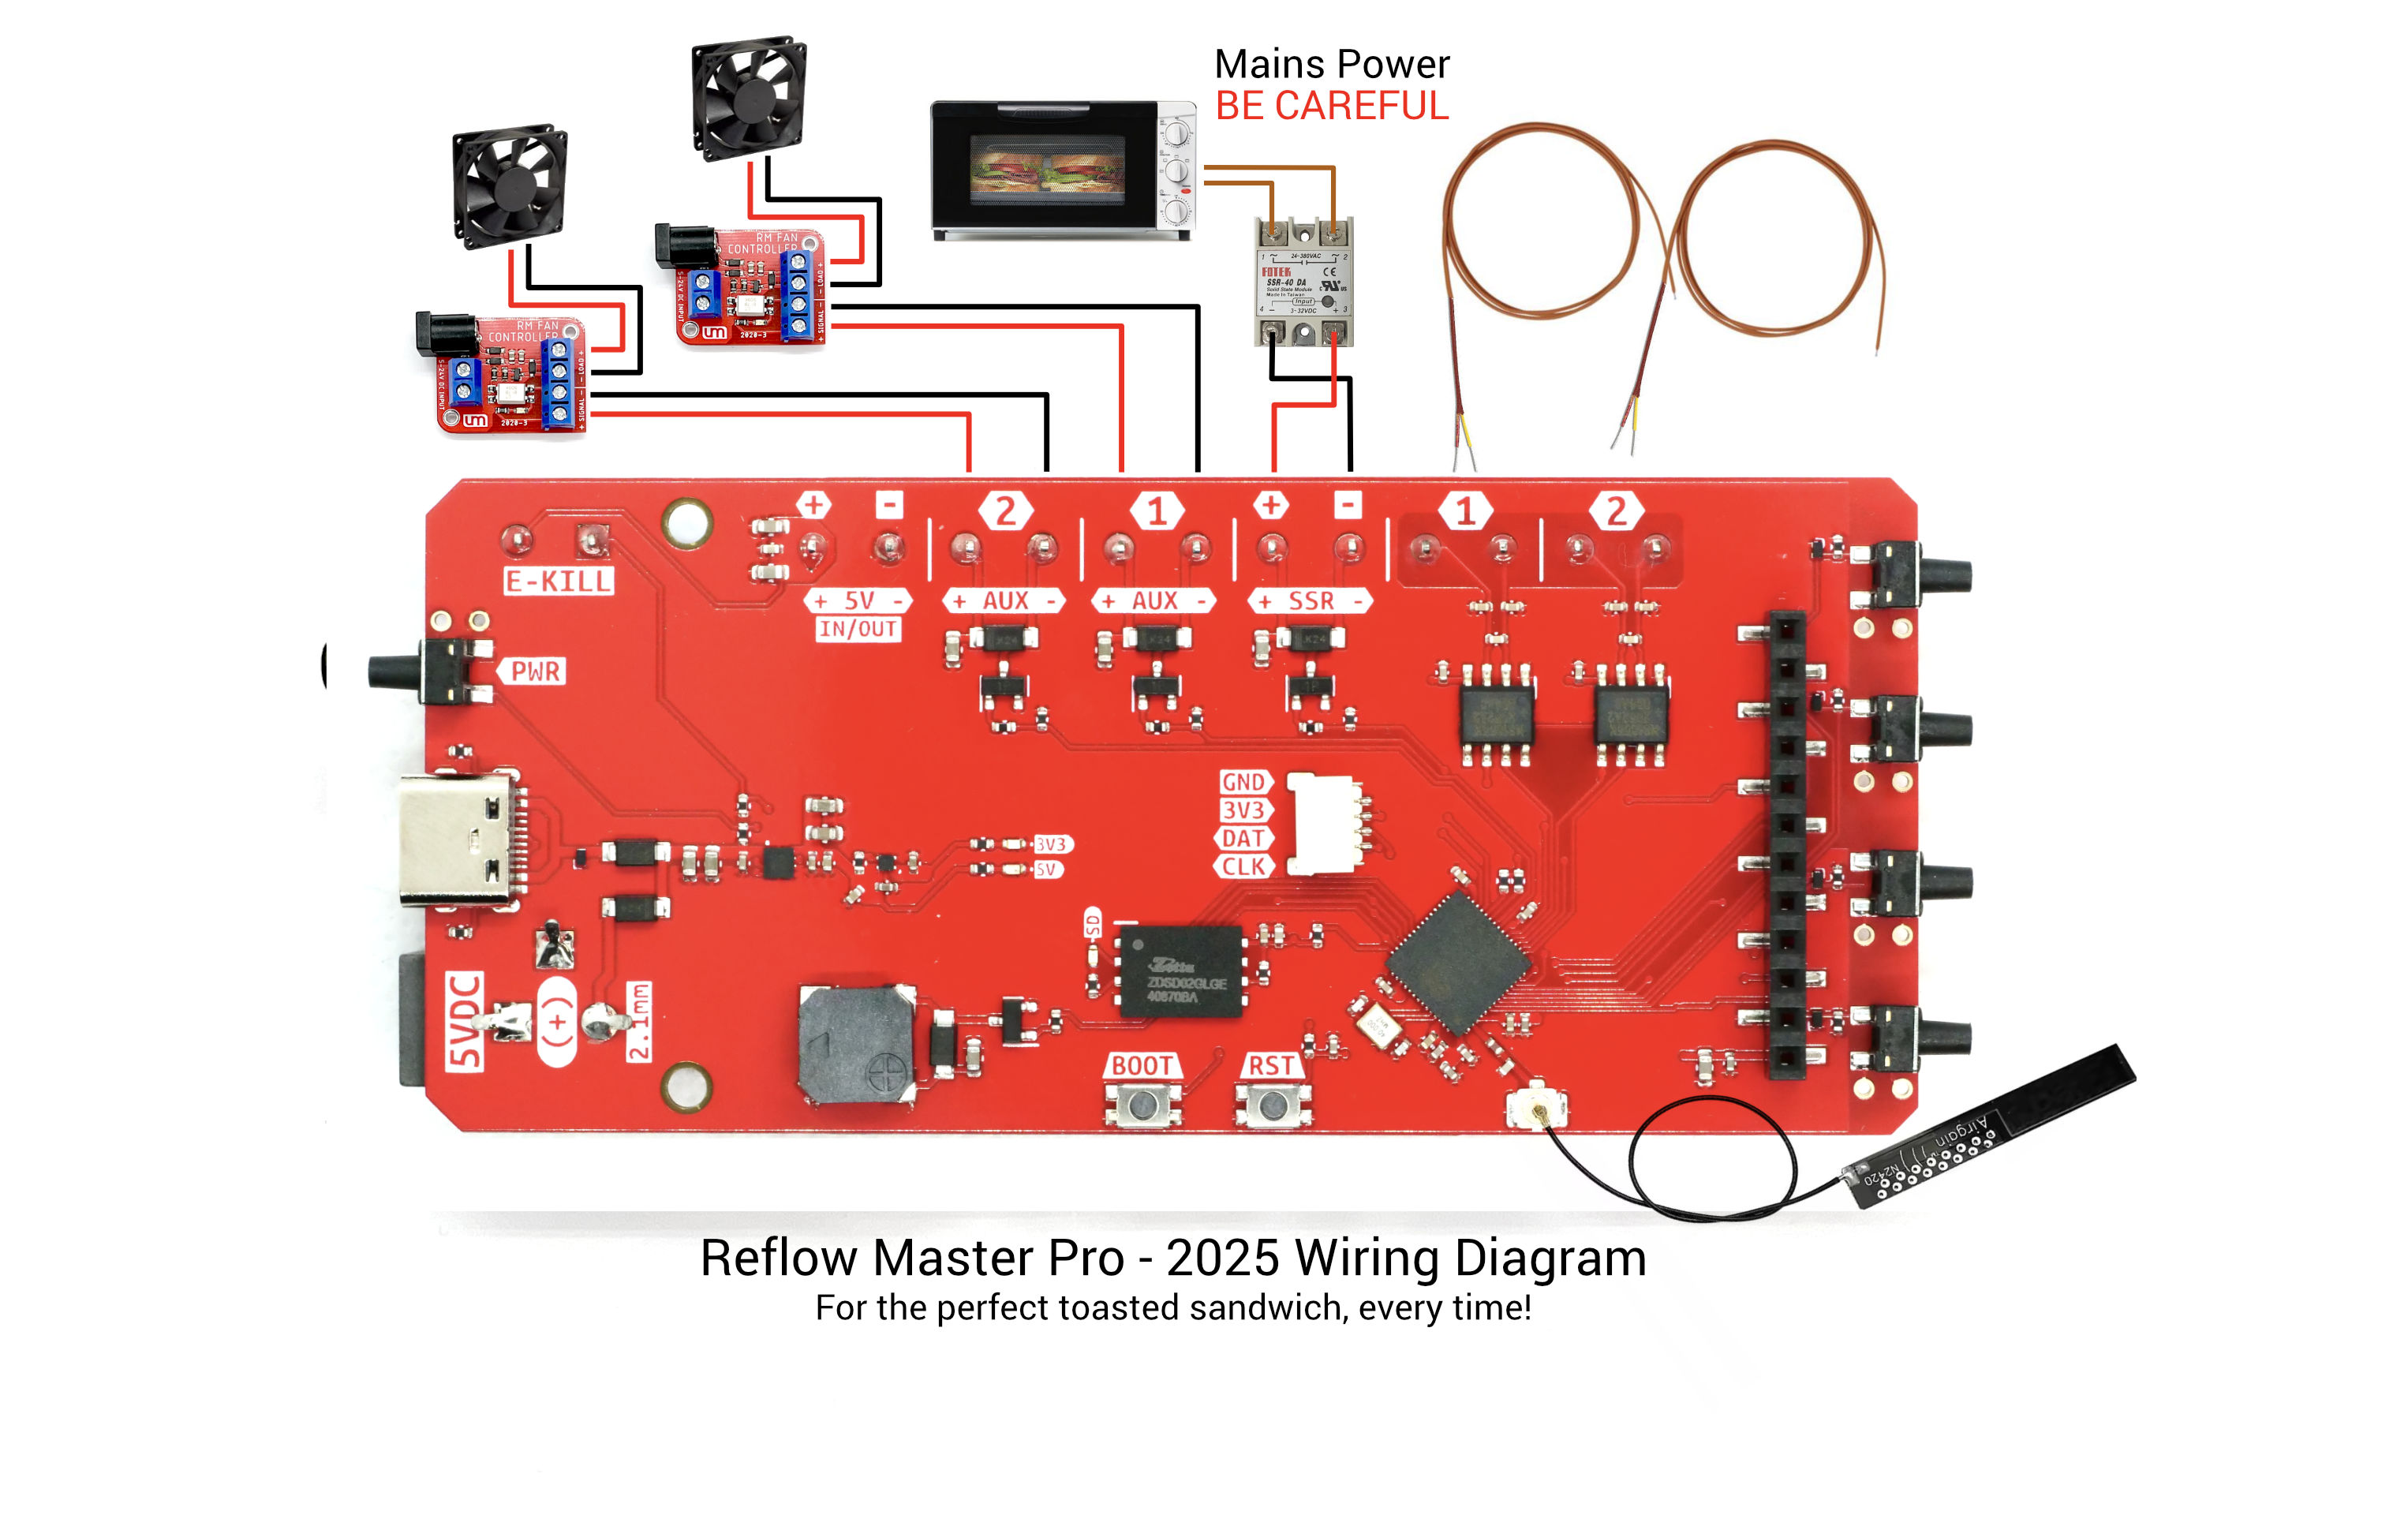
- RM Fan Controller modules for connecting up to 24V fans or other auxiliary devices to the auxiliary ports on the RMP
- Solid State Relay (SSR) ( 5V+ DC <-> 100/240V AC, Zero Crossing)
- USB-C cable or 5V DC power source via barrel jack
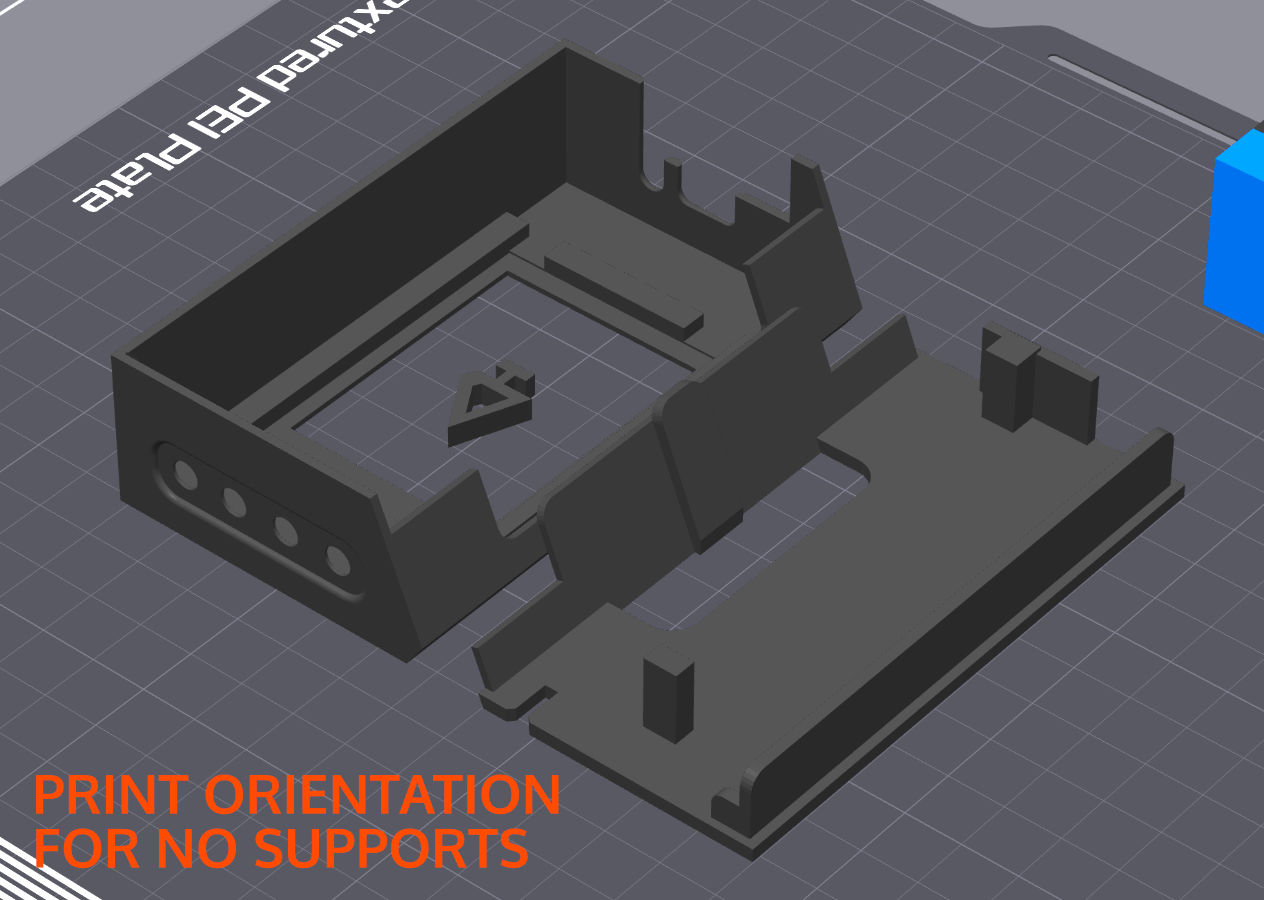
You bet! Just download the STL & STEP ZIP file archive and slice and print them in any colour or material you like!
Use the object orientation shown on the right to be able to print without using any supports.
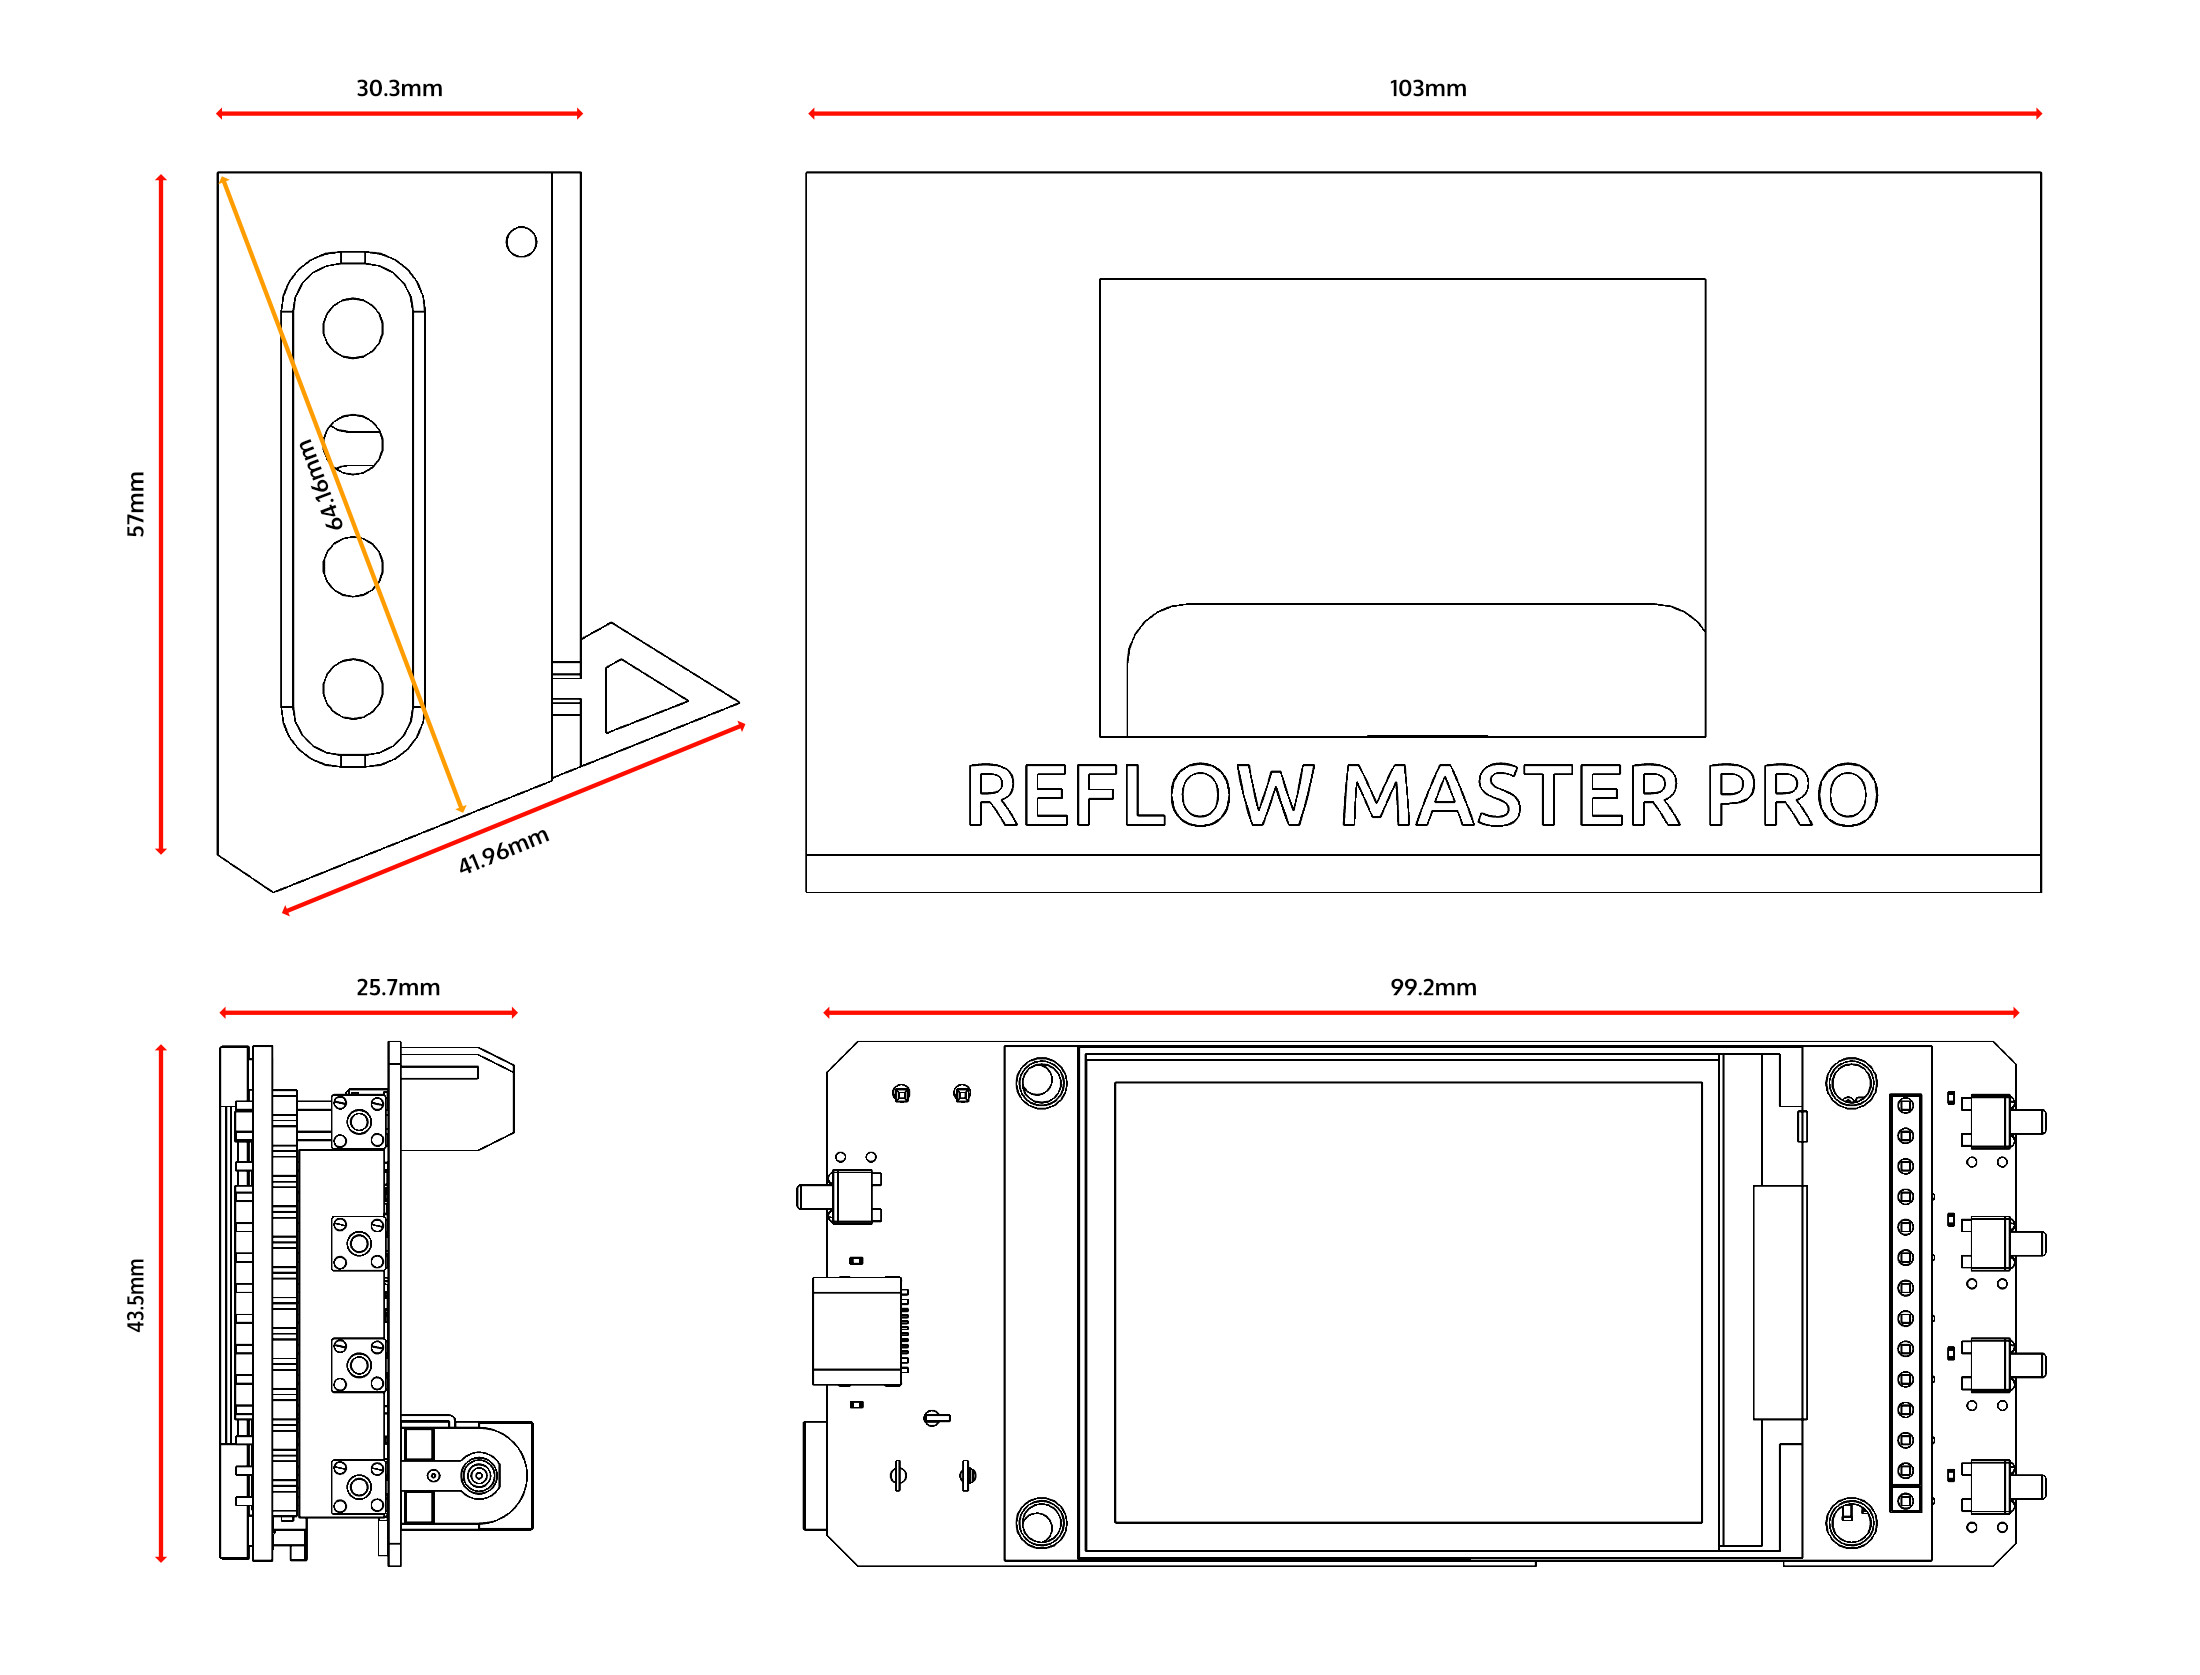
The current case design is the 2025-02 revision that is compatible with the 2025 RMP with external antenna as well as the 2024 and 2023 revisions with onboard antenna.
That's a valid question... Every toaster oven is different and mains power is obviously not universal and is dangerous to play with. I don't feel comfortable supplying a generic "Chinese unbranded SSR" that might be unreliable or inadequate for your specific use case. I could supply something I am prepared to endorse & support, but it would be considerably cheaper for you to source one yourself - rather than me buy one and reship it to you.
This is the SSR that I use ( 15A Model )
Yes, the K-Type thermocouples I supply are good enough for most environments and use cases, but if you are using your Reflow Master Pro in an area that suffers from high frequency noise from power or mobile antennas etc, you may get some extra noise in your temperature readings.
If that is the case, you might want to invest in a better thermocouple, something that is really well shielded in metal or fibreglass, like one of these from Adafruit
Also, if you plan on reflowing high temperature pastes 190deg+, you can use the probes that I ship, but they won't last forever at high temperatures, so I'd definitely recommend investing in glass-shielded thermocouples to ensure the probe shield can withstand the 200deg+ temperatures required for reflow for long term use.
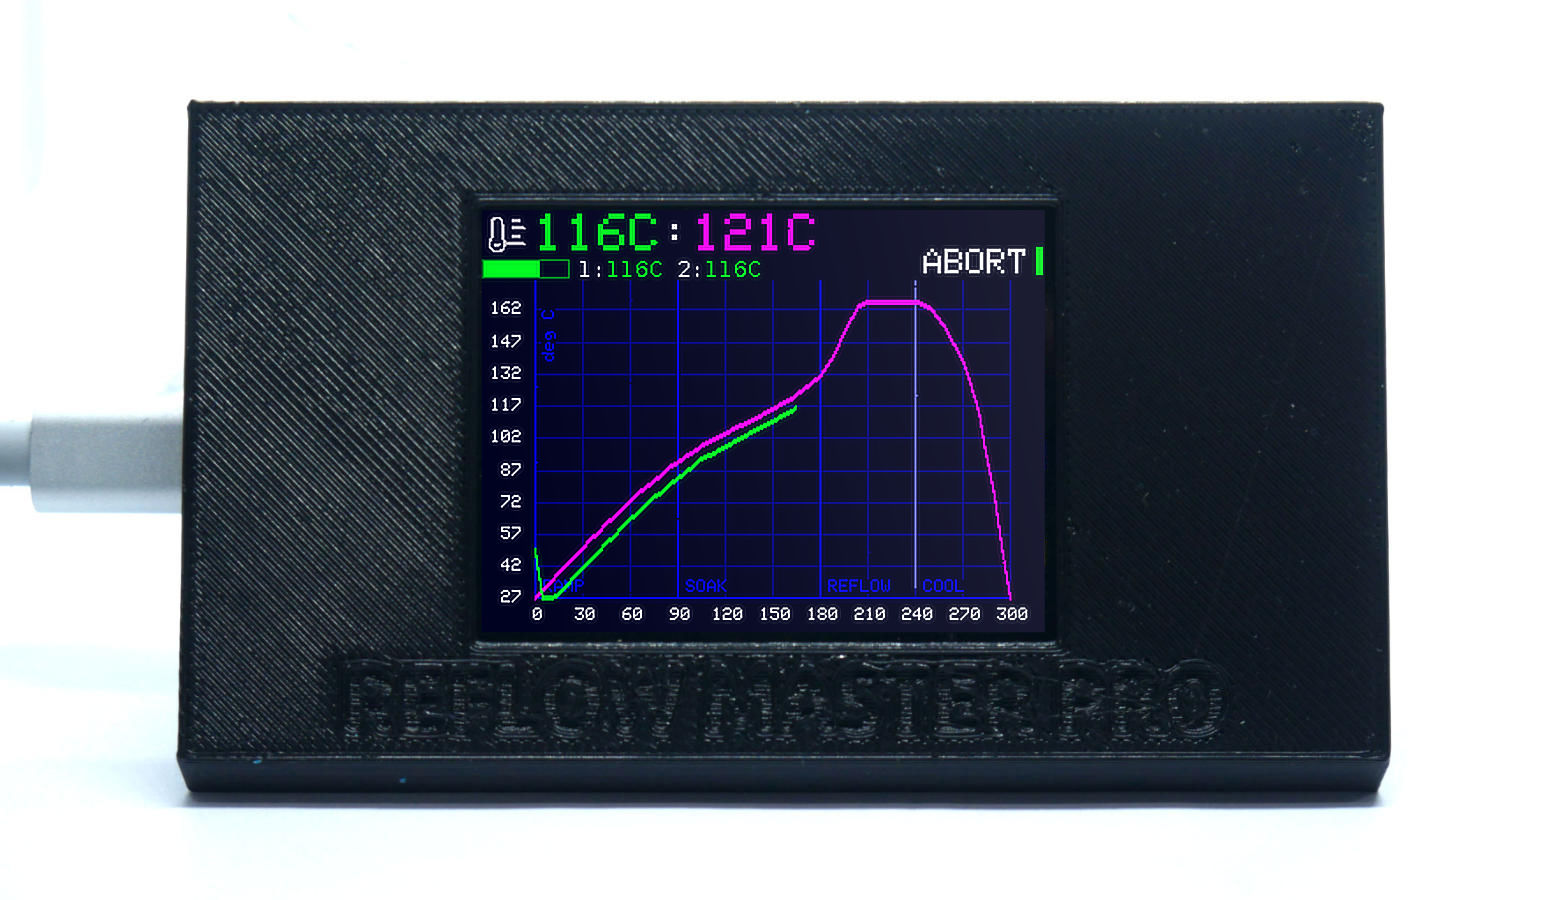
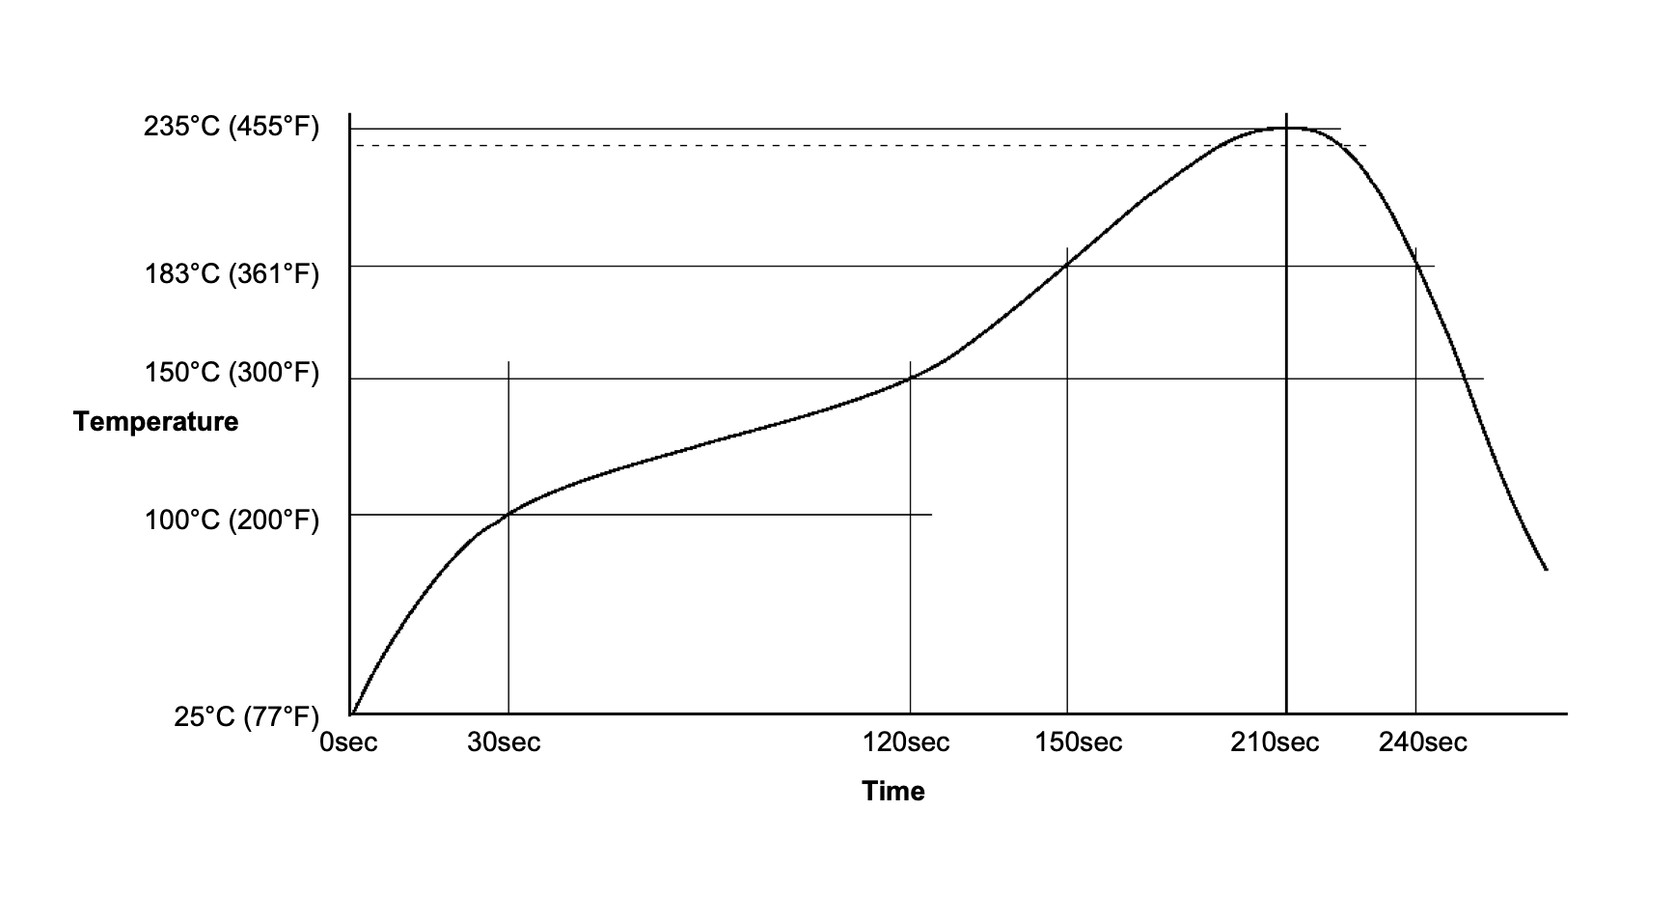
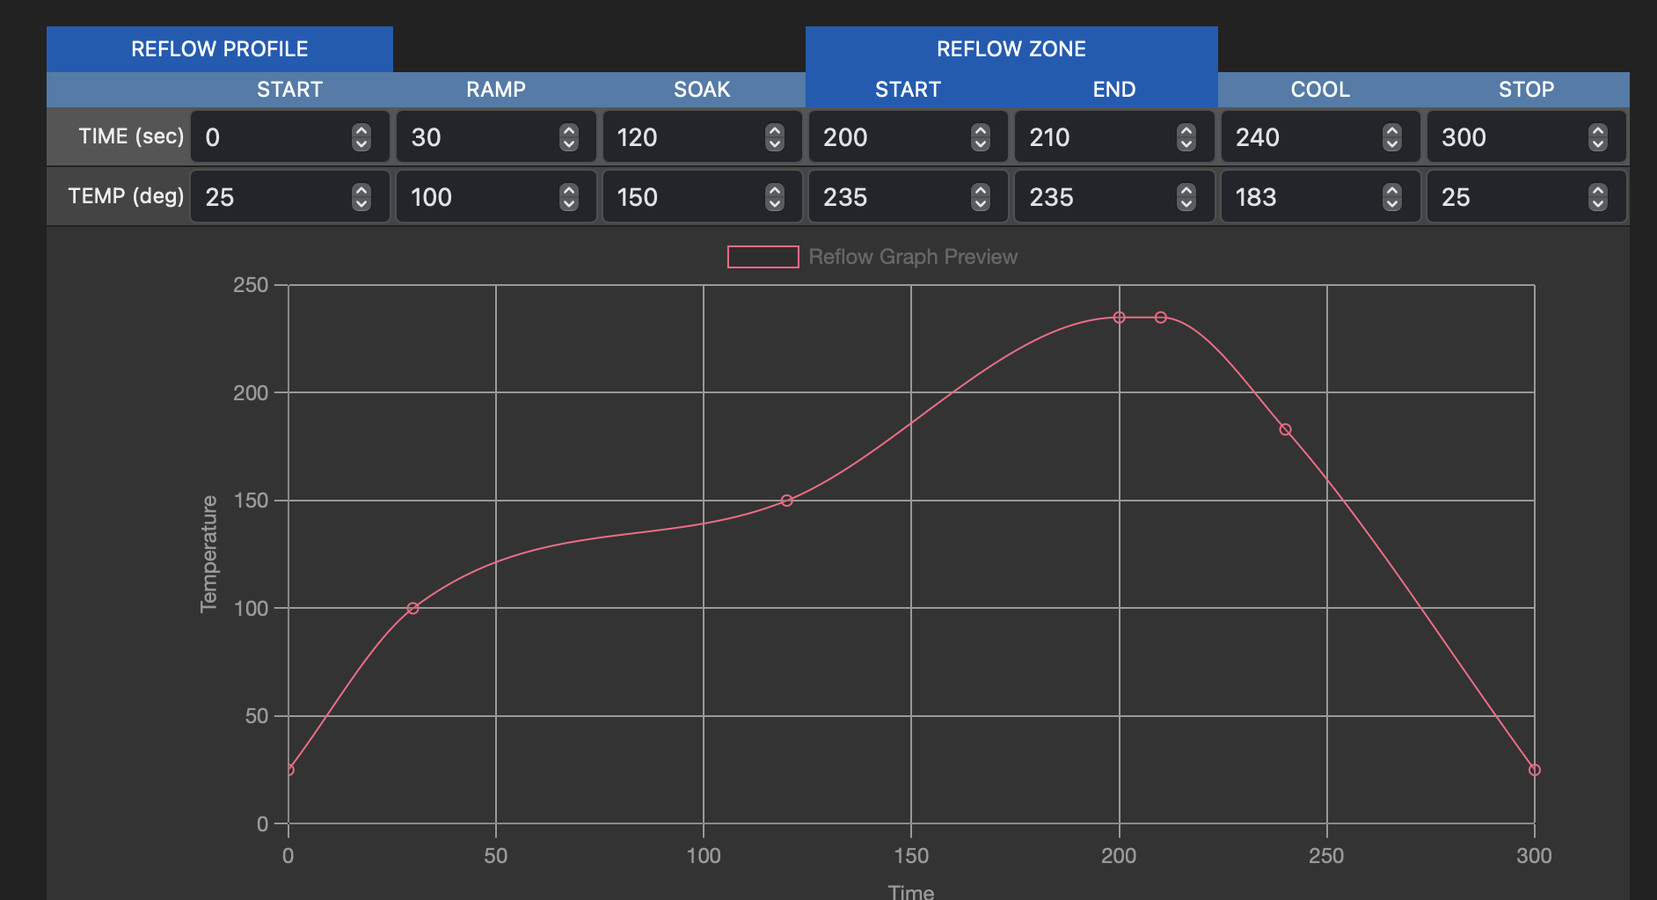
The best way to install the TCs in your oven is to have one sitting just above the board being reflowed and one sitting just underneath. The key is to get the top one to sit about 1-2cm above the PCB, and the bottom one to sit within 1cm of the bottom.
There is no need to have one of the TCs attached to the PCB being reflowed, as that won't necessarily give you an accurate reading for the entire board, and it can be quite difficult to attach and remove the TC from your boards each time, without knocking components or smudging paste.
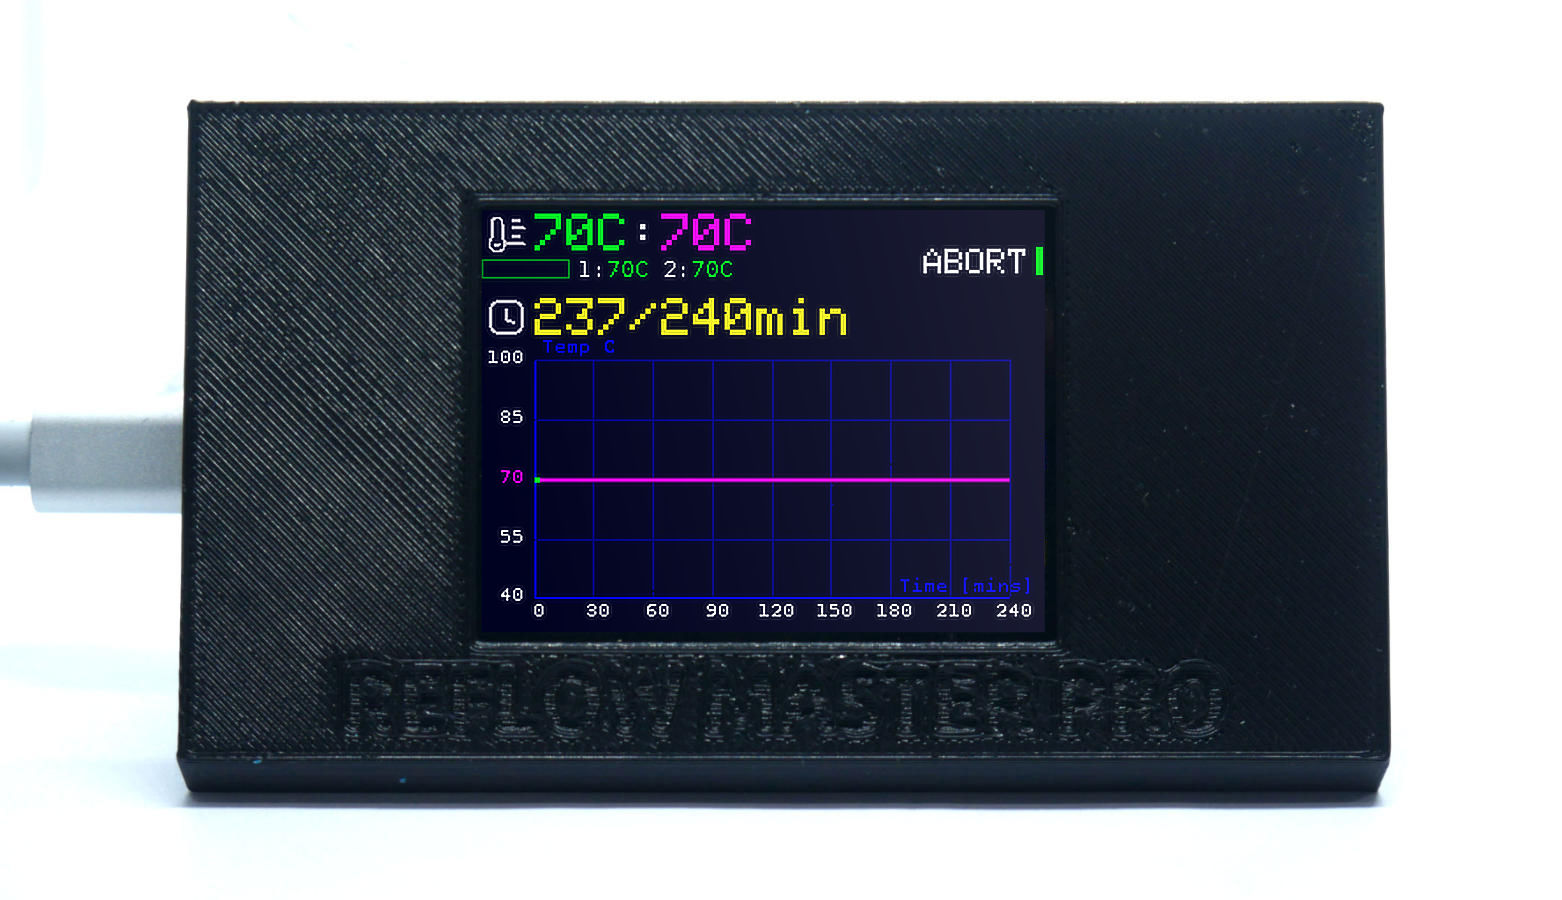
You don't have to use both TCs, and if you only use one, make sure you place it in the top position. When using both TC, the temperature being monitored is the average of both TCs.
You can power your RMP from the 5V IN/OUT terminal, but there should be nothing else on that power rail, as there is no protection on that terminal.
If there is any ripple on the rail above 5.5V, you can easily blow the 3V3 regulator on the RMP, so connecting fans or other peripherals on the same rail should be avoided.
You also need to ensure there's no chance of back-feed/inrush current coming through the rail.
If you are unsure, it's safest to power from USB or the 5V DC jack.
From my own experience and from working with other makers that use both toaster ovens and my Reflow Master, there are 2 key requirements for a toaster oven to be usable as a reflow oven: It needs to be small and powerful - so ideally you want an oven that is 18 Litres or lower in capacity, with 1300W or higher in power.
If your oven is too big or underpowered, or both, then your oven will not be able to get to the initial profile temperature in time to allow for an adequate pre-soak time. You MIGHT still get a successful reflow, but it will likely be out of the guidelines from your solder paste manufacturer - so you'll need to check your specifications for your paste to assess the repercussions.
The smaller the oven, the faster it will heat, just like the higher the power, the faster it will heat. Having a smaller and more powerful oven is the safest bet.
Sure, you can control a hotplate as well if you prefer to reflow your boards that way. Your hotplate will likely be grounded, especially if it's a commercial unit, or one that is powered via AC, so you won't be able to connect a thermocouple directly to it, or it will cause an error when trying to read the temperature. To solve this, you can use some thermal tape to stick the TC to the plate, which will allow heat transfer for the temperature reading, without any electrical connectivity.
Nope! I know it sounds like a great idea, but it's also a really dangerous one, and it would be totally irresponsible of me to allow you to fire off a 280C or higher reflow process, both unattended and without visual monitoring. You don't leave a laser cutter unattended, and you should never leave your reflow oven unattended, especially one that is DIY'd from a toaster oven, where you are controlling mains power.
RM Fan Controllers are basically opt-o-isolated MOSFET switches that you can connect to the AUX outputs of your RMP to drive up to 24V/1A loads like fans or in the future, stuff like linear actuators.
RM Fan Controllers ship with the surface mount parts fully assembled, and the through-hole parts separate, so some soldering is required to use them, but I know you all love to solder, so it's a perfect mix!
Can I just use some cheap $2 MOSFET switches from Ali? Sure, if you want to take the risk, but I can't, in good conscience, ship something like those with my products and be able to trust and support them if they fail. So I designed and make my own, that have had extensive testing, that are built with reliable components and that I trust and can support.
Sure! RMP can reflow any paste - But, what you are really asking here is, can the RMP make an oven that is not powerful enough, or insulated well enough, to reflow high temp paste? No :( Physics is physics, and if your oven of choice is not able to reach the temperature required, fast enough, to manage a reflow profile for a high temperature paste like SAC305, then adding an RMP won't help.
Most toaster ovens, as they come, are not capable of ramping temperature fast enough, or of holding the temperature at the higher end of the process, especially when you start to add extra thermal mass into the equation.... like PCBs with components on them.
That said, there are many folks who have gone to extraordinary lengths to completely insulate their toaster ovens and make them capable of reflowing the most difficult pastes. Do a Google search and you'll find a few projects showing step-by-step how they did it, but be warned - it's a lot of effort, and costs quite a lot to make happen.
The #reflow-master-pro channel in my Discord server also has pictures and discussions from folks that have modded their toaster ovens to get high tep paste reflowing.